After having my Lowrance Elite Ti² fitted for a while the time has come to start utilising more of the features. As I’ve explained in previous articles these Elite units are like small super computers and have more options packed into them than you can poke a stick at. In particular I was keen to start utilising the engine monitoring feature of this unit. There are two main reasons I want to monitor the engine data - the first being I wanted to trial some different propellers to optimise the fuel used on my trips and the second reason is I have some bigger trips planned and being able to watch my actual fuel usage is key to being able to plan some bigger more remote trips away.
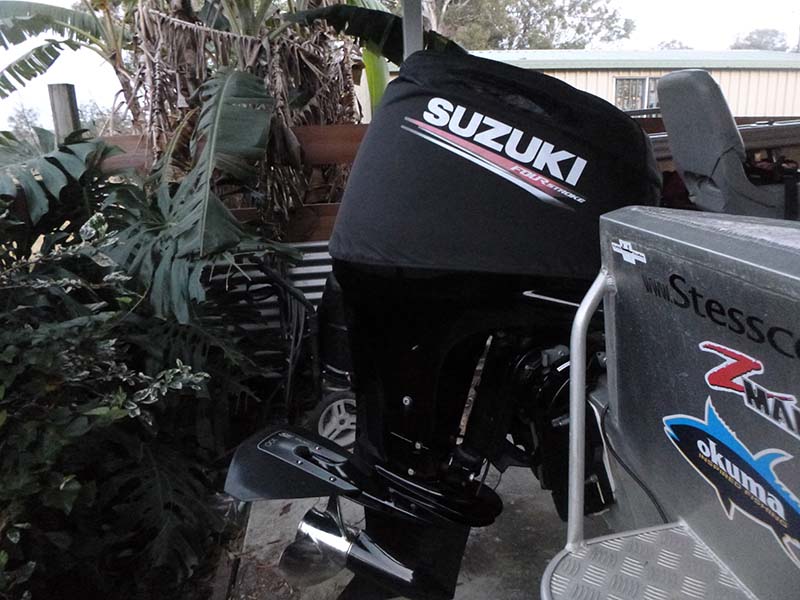
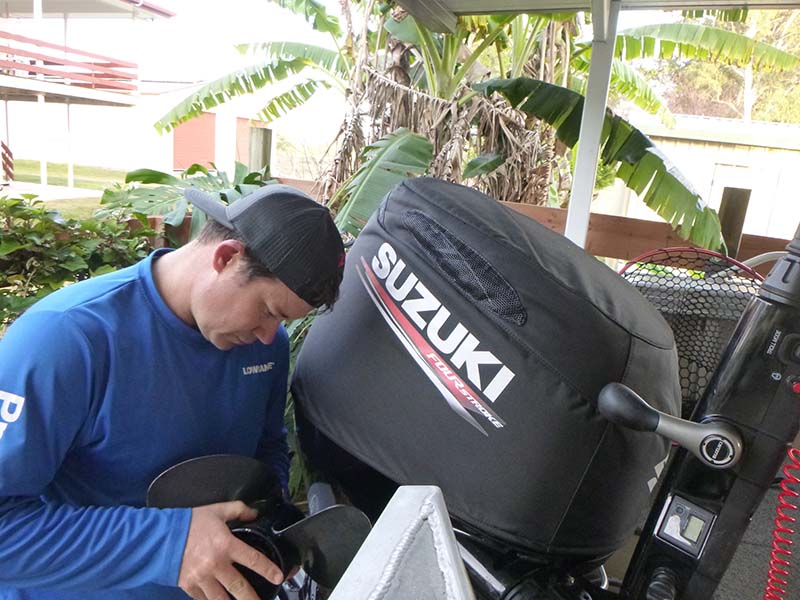
To be honest my boat has been a bit of an ongoing project since new and seems to be in a constant state of upgrades, I’m sure this is nothing new to most fisherman LOL. My outboard is a 70hp 4 stroke Suzuki and to get my engine data onto the sounder there are two key components I required - an NMEA2000 network and the engine interface cable that connects to the NMEA2000 network. The engine interface cabling will vary between outboard brands and models so if you don’t already have one installed you may need to do some research or do what I did hit up your local outboard dealer for some help. Motorsport Marine are mine and they were able to point me in the right direction straight away with regards to the network and interface cable.
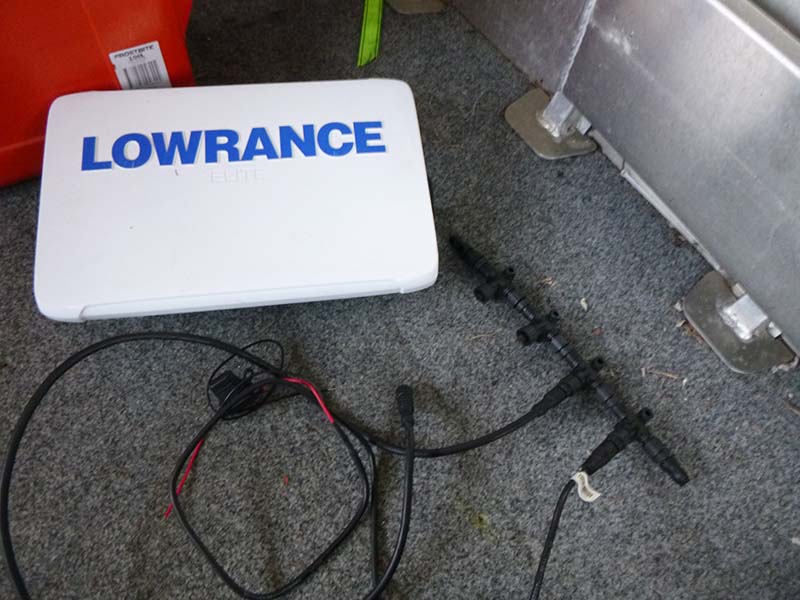
The NMEA2000 networks have been around for a long time and there is plenty of good information out there on the benefits of having one fitted to you boat. In a nutshell a NMEA2000 network allows you to connect multiple electrical devices onto a common network (backbone) which allows for the sharing information between these devices, for example information being transferred between multiple sounders or in my case, allowing my engine to communicate with my sounder. The network itself is made up of terminators (nodes) at each end of a connection of Tee’s. This makes up the backbone itself but as the backbone requires power to operate, a power cable is required to complete a basic NMEA2000 network. There is a ridiculous amount of Tee’s that can be added within backbone with some information suggesting up to 200 meters worth but for me I need about 30cm (for now).
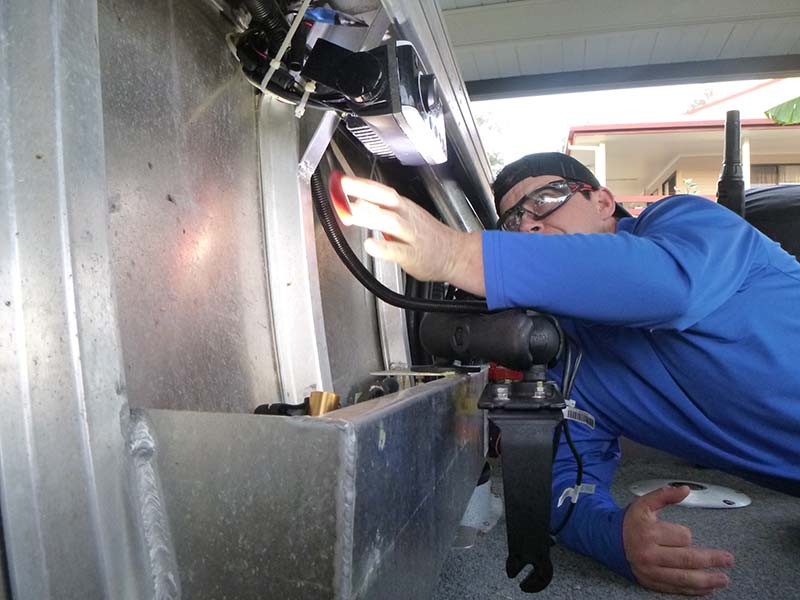
Now that I sourced all the bits, it was time to figure out where to physically locate the backbone and how to run the interface cable and power for the backbone itself. Being an open style tiller steer boat, I am a fan of hiding anything electrical (especially connections) away from the water and when possible I like to tuck everything away under the wide gunnels of the boat. This minimises the amount of water the connections are going to be exposed to from being out and about or overspray whilst hosing down the boat. As there was plenty of space under the gunnels for the cables to be routed nicely into the tees, under the gunnel the backbone went.
I had a relatively short sounder to backbone cable so I chose to start running my wires around from the sounder and work my way back to the engine. A good think to keep in mind when running any cables is how tight you make the bends in the wires, most cables don’t like to be installed under tension or have really sharp bends put into them, the system will work in the short term but after repeated vibrations from the boat the inner wire (conductor) will eventually fatigue or the outer insulation will wear allowing corrosion to destroy the wires, this ultimately leads to loads of problems down the track. Taking a bit of extra time on the wire install will go a long way to increase the reliability and performance of your electronics for years to come. Once I figure out where I wanted to locate the backbone I fixed it in position utilising the fitment holes on the tee’s and some cable ties, with the backbone positioned length ways under the gunnel I have heaps of space to add more tee’s for future.
Now where to splice the power in from? I decided to splice the backbone power in from my sounder power which runs on its own circuit from the main switch panel, as the backbone power cable has its own inline fuse holder I was left with the decision to either remove it and rely on the switch panel fuse or leave it in so the backbone itself is fused and ultimately protected from potential electrical damage if another part of the circuit was to fail. Following a little research I confirmed its better to have it fused even when slicing power into another circuit. So with that in mind I located the area and spliced power in from the sounder power and used some splices that are heat shrunk down to keep the moisture out, then tucked it all away back into the gunnel.
Now to install the engine interface cable, for this I really just followed my nose. Running along the same route as the rest of my cables and making sure that at any potential wear points the cable was protected by either spacing it away from an edge or adding extra out protection to the wires.
Once I got to the last bulkhead connection before the engine, I needed to leave enough slack in the interface cable to allow for full movement of the engine left and right and also ensure the cable would not get caught whilst trimming the engine up and down, a simple approach here is to follow the main loom to my engine which has the battery cables in it. Once at the engine, the cowling came off and with some fiddling around the interface cable was run into the connection point. Like I said earlier your local outboards dealer will be able to help and if you not confident working on your engine give them a bell.
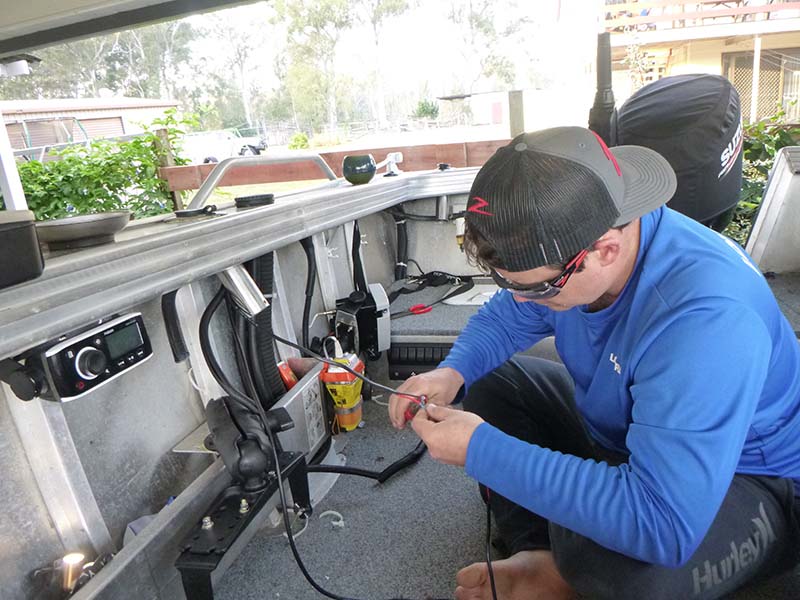
Next up was to set up the system:
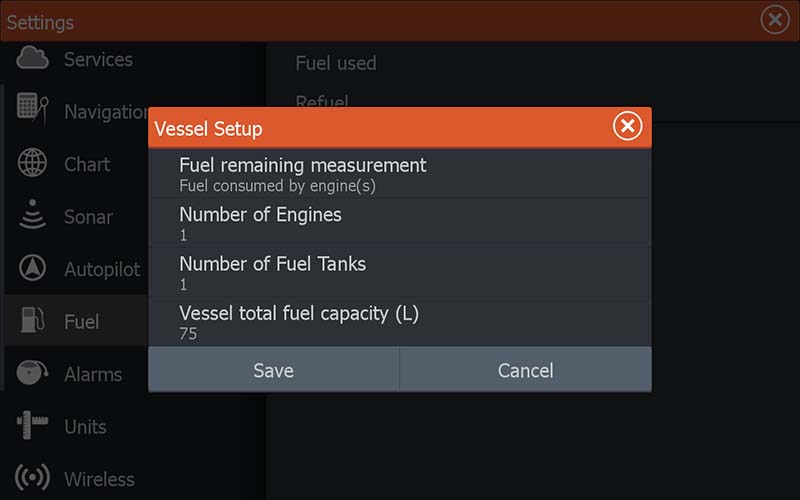
If you’ve never set up the engine data on your unit before it can be a little confusing and as this is the first time I had ever attempted it. I engaged the help of a good friend of mine Phil from Motorsport Marine, he was able to work through the menus and help set up the dashes on my Elite Ti² unit. The most relevant information I was looking for is the fuel litres per kilometre and overall fuel usage per trip. With the fuel tank holding approximately 80lt I left a little buffer by setting my upper fuel limit to 75lt. Now that the limits have been set, every time I fill the tank I can reset my limit on the sounder to full and the sounder will calculate my fuel usage base on the engine data and calculate the remaining fuel.
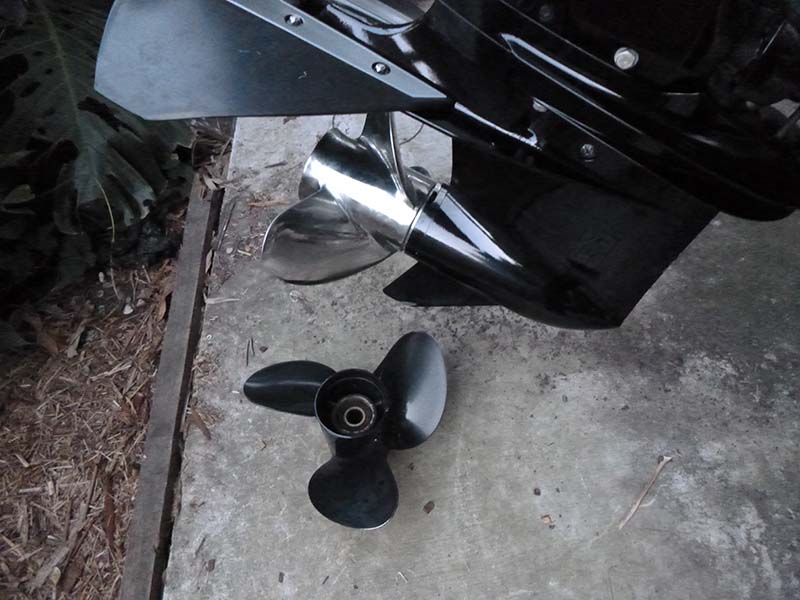
So from here it was time to get on the water and see how the boat performed with the different propellers, in the end there were two propellers that I settled on. My original allow propeller was a Suzuki 3X14X17 which to be honest performed ok on the boat, but the two tried and liked was an aftermarket one being OAM stainless 14X19 and a newer 14X19 called Dolphin Stinger from Oz Marine which sits in between alloy and stainless for material, its stiffer than alloy without the weight and chatter that can be experienced by running a fully stainless propeller. Performance wise by going a little bigger meant I lost a little on the hole shot and a small amount of Rev’s at the top end but I seemed to gain performance through the lower and mid Rev ranges.
Put very simply the boat planes comfortably at a lower RPM and on the longer trips via Elite Ti² unit I am able monitor my performance by keeping an eye on the engine Rev’s and fuel usage rate and when running on those longer trips the boat can be trimmed out to reach an optimum performance. By changing the propeller and being able to watch live engine performance data I have save approximately 5-10 litres on my longer days running offshore which is awesome especially when watching the fuel prices jumping all over the place, it’s safe to say I am stoked with this saving.
Over all I am extremely happy with the addition of a NMEA 2000 network and engine data to my boat, along with the engine and fuel data it has opened up more options of additional sounders and fully interfaced radios and so on. After doing a little research on the internet a Lowrance basic network will set you back approximately $100 give or take, so it’s not a big expense for more electronic capability.
Thanks for reading I hope you’re finding some fish.
Screaming Dragz Sean


