
Most owners have the best intentions to manually set up their new sounder. In reality, this is often overshadowed by a lack of time or knowledge and before too long the window of opportunity ultimately passes by. Human nature generally dictates that the longer we leave things the less likely we are to address them. Many top-of-the-range units are instead left to run on true auto mode. Sure, the auto functions of modern units, particularly the Lowrance range, are nothing short of exceptional. But it’s quite a bitter pill to swallow when you consider the general cost of a quality unit and the untapped potential that lays dormant and wasted behind the screen. End users are inevitably the ones who miss out on a stack of vital information and targeted results that would otherwise have improved the fishing success rates. So, in an attempt to advise new Lowrance owners whilst also encouraging existing users about how to fine tune their sounder, I’ll provide a bit of a run down on how I went about setting up my own HDS LIVE unit recently.
Start-Up
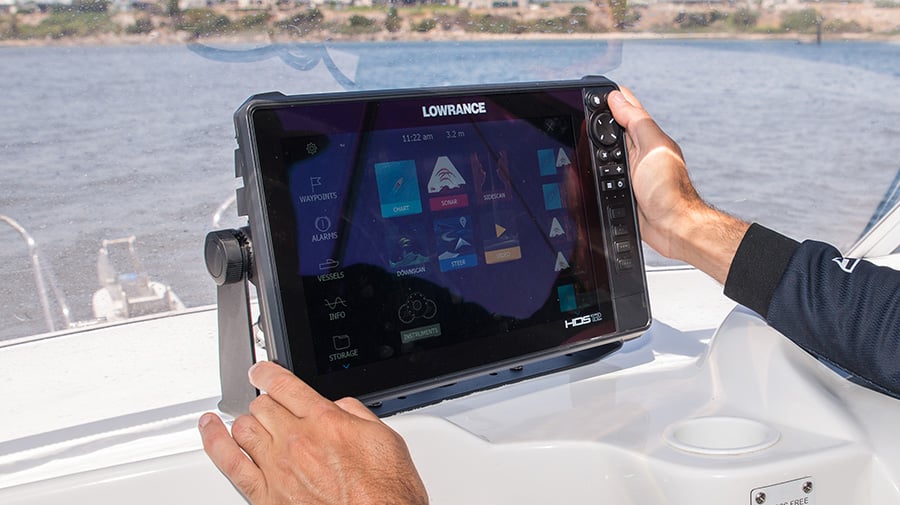
The initial start-up of a new unit guides you through a series of generic prompts to get the basic installation process underway. The real fine-tuning, however, starts once this has been completed. Surprisingly, it’s not all about sounder frequencies and on-screen returns straight off the bat. Instead, there’s a few steps that I prefer to tackle first. Consider your main fishing styles and the various screen combinations that you’re likely to utilise on the water like DownScan, normal sonar, mapping etc.
A few pre-set combinations exist in the unit and whilst handy to get the ball rolling they’re unlikely to serve all of your needs. For this very reason I like to create my own combinations via the Home page which is accessed by a quick press of the Pages button. Once you’ve setup your preferred combinations through an effortless drag and drop touchscreen process the HDS LIVE allows you fine-tune the splits and window sizes further. This is really handy for maximising the windows you want to pull most detail or information from whilst minimising those less important.
Tweaking the auto sensitivity is a great way to start the learning curve
SideScan, for example, is something that I like to run in a horizontal format to really take advantage of the full width of the screen and the DownScan and/or traditional sonar can then run either beneath or above it. If these windows instead ran in a side by side configuration then it really would compress the SideScan image into half a screen which is not really ideal for visibility so I’m sure you’re starting to get the idea of what you can achieve here.
Once the likely screen combinations have been developed I then like to move onto Data Overlay. Think of this as your on-screen data information running over the top of your sonar or mapping. There’s a stack of options that can be accessed via System Controls (pressing the power button), selecting Turn On Overlay and then entering into Edit Overlay. Water depth, temperature, speed and distance to destination (DTD) are some of the key data overlays that I like to utilise however you need to be mindful of not over-cluttering the screen as this will otherwise limit sonar or map visibility beneath it. Thankfully, text size can also be adjusted so you may wish to keep the really important stuff in big text format to easily see from the back of the boat and less important data can remain a smaller size.
At this stage of the process you also want to be installing your transducer type through the Home Page > Settings > Sonar > Installation and whilst you’re there I’d recommend adjusting the depth offset to reflect the true depth of the water from top to bottom, not from transducer to bottom unless this is your preference. To do this, you’ll need to measure the vertical distance between your transducer and the waterline and add this as a positive value.
Understanding Frequency
Sonar frequency is an area that tends to scare or confuse a lot of novice sounder users and with more sonar frequencies at our disposal now than ever you can easily appreciate why. A good understanding of sonar frequency however will certainly allow you to personalise and maximise the capability of your unit. For 2D sonar on the HDS LIVE with a typical 3-in-1 Active Imaging transducer we have the main options to run 200kHz, 83kHz, medium CHIRP or high CHIRP. Without getting too technical here think of a high frequency traditional sonar ie 200kHz as a very narrow and tight sonar beam that results in highly detailed returns.
Medium frequencies ie 83kHz produce a wider beam and consequently not as much detail, however they do have better depth penetration than 200kHz. Rather than transmitting a single frequency alone CHIRP sonar instead transmits a range of frequencies from the transducer. For example, high CHIRP will typically produce pulses within the range of 140-250kHz or thereabouts and medium CHIRP within around 85-155kHz. Additional information provided by this wider frequency range results in a much clearer and higher resolution image which is even better for target separation.
Screen split adjustments allow you to maximise the windows that you want to see most
The HDS LIVE allows you to easily change between frequency options depending on your needs however most will tend to gravitate to either 200kHz or high CHIRP as they are both preferred for finding fish and detailed structure in the more shallow to medium depths that the average punter would be targeting. This is certainly my preference and I rarely find myself reverting to medium CHIRP or 83kHz for all the fishing I do.
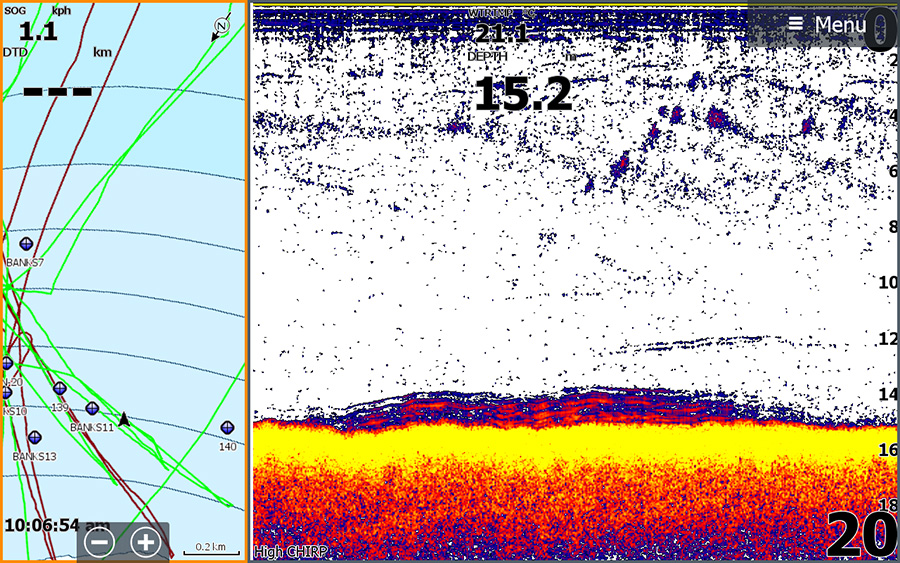
StructureScan (Down or SideScan) frequency can also be flipped between 455kHz or 800kHz. Once again the same principals of beam width and detail apply so you really need to question whether you’re aiming to search a wide area or narrow down a little with the benefit of more detail displayed on the screen. I think this is highly dependent on the where and how. Some of the areas we search for kingfish are quite barren in regards to bottom makeup so I opt for a 455kHz frequency to cover more area. A less detailed return is not as crucial because any fish markings will stick out like the proverbial when this is the case. In areas of notable bottom structure however I will routinely change to 800kHz because it becomes much harder to depict the fish from anomalies or structure on the sea floor and the higher frequency will offer better detail and target separation.
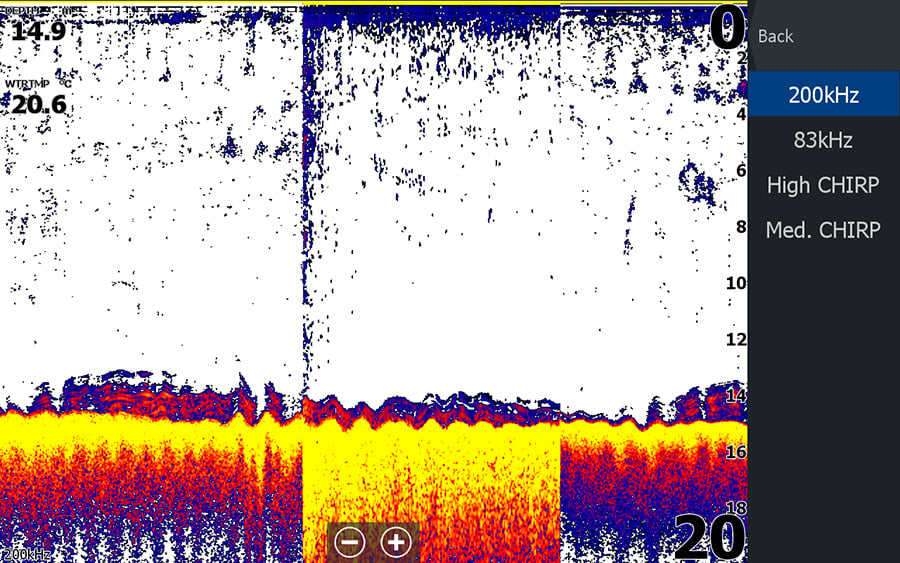
A side by side comparison of different sonar frequencies is seen here
Sonar Detail
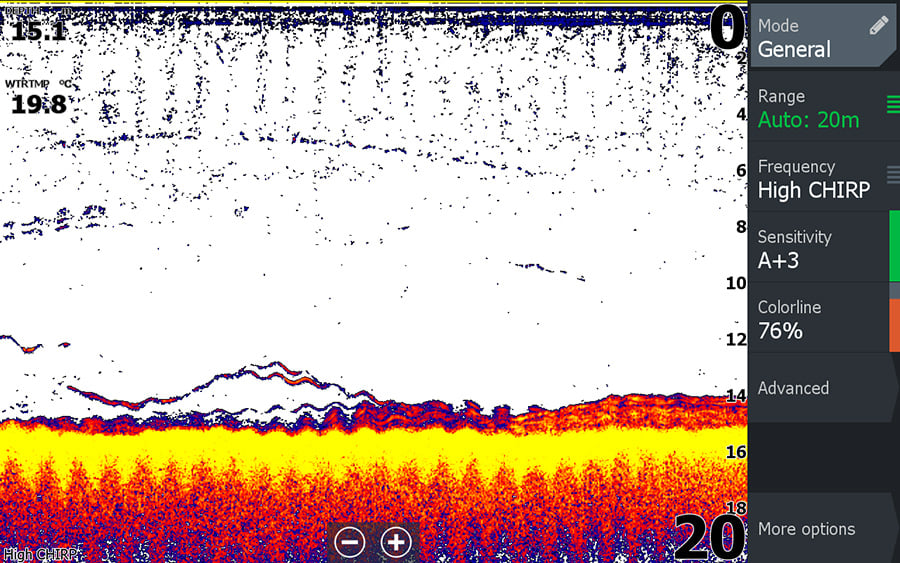
So with frequencies better understood and determined we can now move on to what most of us buy a sonar unit for in the first place, finding fish and structure. Thankfully, Lowrance HDS LIVE technology allows us to completely tune this down to the finest detail for optimal performance. The sensitivity setting can be tackled initially and this will help reduce on-screen clutter and further highlight the stuff you’re looking for. This can vary greatly not only due to the water and systems you are fishing but the transducer also needs to be mounted correctly and free of any interference or turbulence. The Auto function does admittedly get it pretty close here so instead of going full manual mode the HDS LIVE lets us fine tune or calibrate the auto setting further. I like to dial it up or down around 2 or 3 notches depending on the conditions and return that I’m getting. This will read something like A+3 or A-3 on the unit, basically meaning we are utilising the auto mode but with a bit more or less detail respectively.
Colour palettes for all forms of sonar can often be dictated by the amount of daylight, shadows, head unit mounting location or even how good your eyesight is but they are also heavily individualised and there’s not necessarily any right or wrong choice when selecting one. Whilst having experimented with different palettes including the images accompanying this article I’m still a bit of a sucker for Palette 13. This is not only because that’s what I’ve been used to with my previous Lowrance sounders, but I also like how the bottom is shaded brown as this helps with spotting any tightly hugging fish.
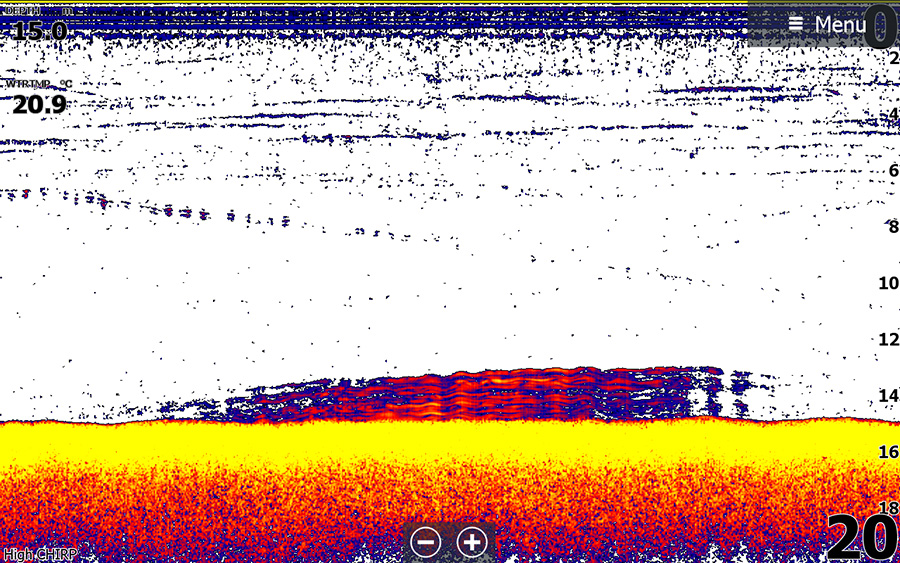
High CHIRP provides amazing target separation even with densely packed schools of fish
Understanding and interpreting your preferred colour palette over time really is very important and should never be overlooked. For example, I know on my preferred palette a really big fish such as a yellowtail king will show up with yellow or green in the middle of its return whilst smaller baitfish remain blue and medium sized stuff in between is usually red to yellow. This undoubtedly helps narrow down the guessing game of what could be swimming below and the confidence is certainly bolstered as a result. Fish returns can be fine-tuned further with the colourline setting however you hopefully shouldn’t need to alter it too much from default. At the end of the day don’t be afraid to play around with palettes and the colourline (and even the contrast setting on StructureScan) to see what options allows things to stick out the most.
Extra Considerations
Ping speed refers to how fast the transducer is sending out pulses and thankfully this is pre-set to maximum as default on the HDS LIVE to achieve the most detail possible and there is no need to adjust this. Scroll speed on the other hand is the speed at which the sonar information updates on screen and not that I’m a very impatient person but I like to bump this up a notch to provide me with slighter quicker updates. Keep in mind however that a faster scroll speed will start to change your fish returns within respect to boat and/or drift speed. They may instead start to appear more as squiggly lines rather than true fish arcs because the screen is updating quicker as the fish remains beneath the boat and within the sonar beam.
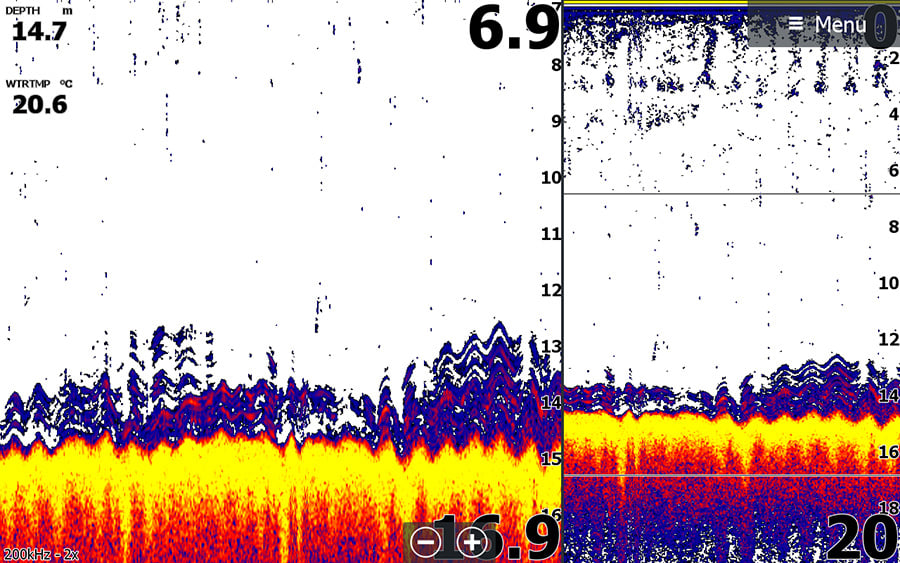
A school of king george whiting can be seen here hugging the bottom tightly
I prefer to keep the noise rejection setting off as it has the potential to mask your fish returns and hide things. If you’re getting a lot of noise however either tweak your sensitivity to help clear up the screen or try and determine the cause of the noise ie super shallow/turbulent water or another transducer operating within the immediate vicinity. Surface clarity on the other hand may need to be adjusted on the fly depending on your fishing scenarios but it is very useful in reducing the amount of clutter towards the top of your screen. If targeting fish near the bottom then it probably doesn’t matter too much. However when searching for bait schools or pelagics in the upper third of the water column I’ll at least set it to low to help filter out a lot of the water turbulence and noise found here but still maintain the ability to spot fish. Setting it to high is very risky as it really will reduce your returns thus increasing the likelihood of missing fish towards the surface.
Speaking of the surface I really have only scraped it as far as Lowrance HDS LIVE functionality goes but I really can’t stress the importance of embarking on a similar process to maximise your unit’s potential. It may require the need to leave the rods at home and embark on a dedicated trip or two to really hone in on the specifics. But once up and running properly you’ll no doubt be thankful that you invested the time and with any luck the fishing results will reinforce it further. Oh and don’t forget the Lowrance Installation and Operational manuals at home; they’re bound to be your best friends!


